今回の例題では、RTCモジュールについて説明してみようと思います。
RTCモジュールとは?
Real Time Clockの略字で、パソコンやボードに、電源が供給されていなくても時間をカウントすることができるモジュールです!
ここで使用するモジュールは Tiny RTC I2C モジュール(DS1307)です。
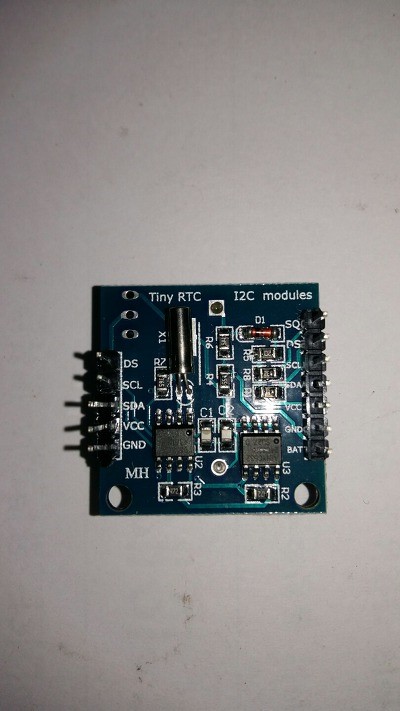
通常通りに時間を測定する用途で使用するならば、SCL、SDA、VCC、GNDだけを接続させます。
また、内蔵された温度センサーを利用したい場合はDSピンを使用して温度値を受け取ることができます。
また、バッテリーの残量はBATピンを使用して把握できます。
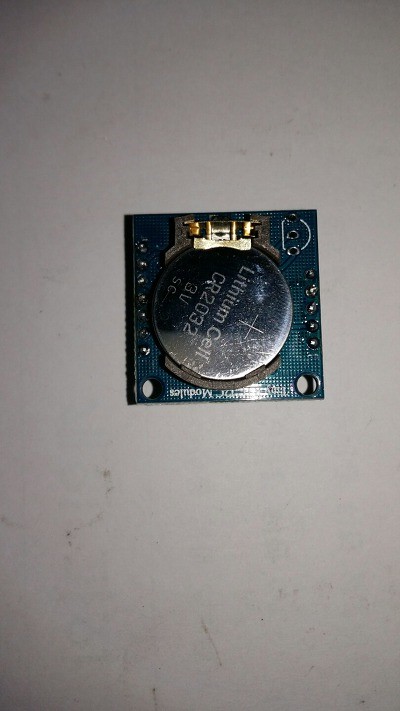
電池を入れておけば、ボードからの電源が供給されない時も時間をカウントできますよね?
それでは、もう一度使用してみます。
先ず、次のようにライブラリをインストールして設置してください。
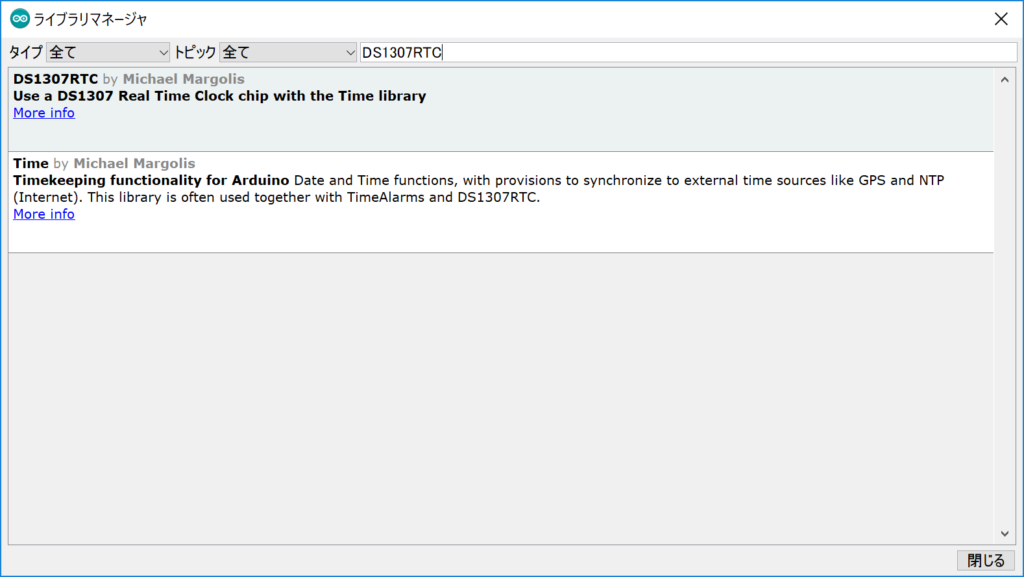
その後、DS1307RTCの例題のSetTimeを開きます。
|
1
2
3
4
5
6
7
8
9
10
11
12
13
14
15
16
17
18
19
20
21
22
23
24
25
26
27
28
29
30
31
32
33
34
35
36
37
38
39
40
41
42
43
44
45
46
47
48
49
50
51
52
53
54
55
56
57
58
59
60
61
62
63
64
65
66
67
68
69
70
71
72
73
74
|
#include <Wire.h>
#include <Time.h>
#include <DS1307RTC.h>
const char *monthName[12] = {
“Jan”, “Feb”, “Mar”, “Apr”, “May”, “Jun”,
“Jul”, “Aug”, “Sep”, “Oct”, “Nov”, “Dec”
};
tmElements_t tm;
void setup() {
bool parse=false;
bool config=false;
// get the date and time the compiler was run
if (getDate(__DATE__) && getTime(__TIME__)) {
parse = true;
// and configure the RTC with this info
if (RTC.write(tm)) {
config = true;
}
}
Serial.begin(9600);
while (!Serial) ; // wait for Arduino Serial Monitor
delay(200);
if (parse && config) {
Serial.print(“DS1307 configured Time=”);
Serial.print(__TIME__);
Serial.print(“, Date=”);
Serial.println(__DATE__);
} else if (parse) {
Serial.println(“DS1307 Communication Error :-{“);
Serial.println(“Please check your circuitry”);
} else {
Serial.print(“Could not parse info from the compiler, Time=\””);
Serial.print(__TIME__);
Serial.print(“\”, Date=\””);
Serial.print(__DATE__);
Serial.println(“\””);
}
}
void loop() {
}
bool getTime(const char *str)
{
int Hour, Min, Sec;
if (sscanf(str, “%d:%d:%d”, &Hour, &Min, &Sec) != 3) return false;
tm.Hour = Hour;
tm.Minute = Min;
tm.Second = Sec;
return true;
}
bool getDate(const char *str)
{
char Month[12];
int Day, Year;
uint8_t monthIndex;
if (sscanf(str, “%s %d %d”, Month, &Day, &Year) != 3) return false;
for (monthIndex = 0; monthIndex < 12; monthIndex++) {
if (strcmp(Month, monthName[monthIndex]) == 0) break;
}
if (monthIndex >= 12) return false;
tm.Day = Day;
tm.Month = monthIndex + 1;
tm.Year = CalendarYrToTm(Year);
return true;
}
|
cs |
このコードをアップロードさせると、RTCモジュールに現在のパソコンの時間が入力され、この時間を基準に実際の時間がカウントされます。
getDateを利用して現在のパソコンの日付、そしてgetTimeを利用して現在のパソコンの時間の入力を受けます。
★コンパイル時に「tm」というエラーが発生した場合★
Time.hヘッダーをTimeLib.hに変更して再度コンパイルしてみてください。
コードをアップロードさせた後、シリアルモニタを開いてみましょう。
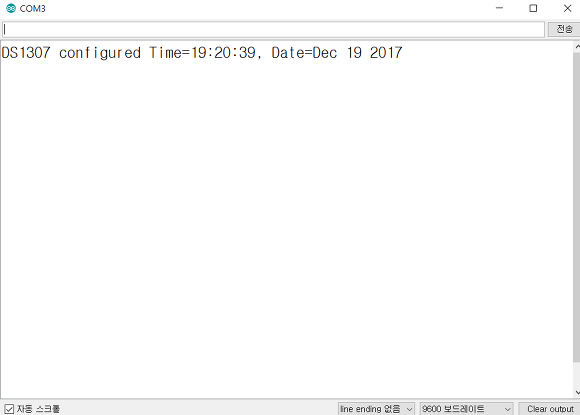
上のシリアルモニタのように出力されたなら、時間設定は完了です。
それでは、実際にカウントが正常に行われているのかを確認してみましょう。
DS1307RTCスケッチ例のReadTestを実行してみます。
|
1
2
3
4
5
6
7
8
9
10
11
12
13
14
15
16
17
18
19
20
21
22
23
24
25
26
27
28
29
30
31
32
33
34
35
36
37
38
39
40
41
42
43
44
45
|
#include <Wire.h>
#include <TimeLib.h>
#include <DS1307RTC.h>
void setup() {
Serial.begin(9600);
}
void loop() {
tmElements_t tm;
if (RTC.read(tm)) {
Serial.print(“Ok, Time = “);
print2digits(tm.Hour);
Serial.write(‘:’);
print2digits(tm.Minute);
Serial.write(‘:’);
print2digits(tm.Second);
Serial.print(“, Date (D/M/Y) = “);
Serial.print(tm.Day);
Serial.write(‘/’);
Serial.print(tm.Month);
Serial.write(‘/’);
Serial.print(tmYearToCalendar(tm.Year));
Serial.println();
} else {
if (RTC.chipPresent()) {
Serial.println(“The DS1307 is stopped. Please run the SetTime”);
Serial.println(“example to initialize the time and begin running.”);
Serial.println();
} else {
Serial.println(“DS1307 read error! Please check the circuitry.”);
Serial.println();
}
delay(9000);
}
delay(1000);
}
void print2digits(int number) {
if (number >= 0 && number < 10) {
Serial.write(‘0’);
}
Serial.print(number);
}
|
cs |
このコードはとても簡単ですね。
RTC.read()関数を実行した後、
「tm」という客体が持っている変数のHour、Minute、Secondなどを利用すれば簡単に現在時間を読み取ることができます。
そして、「print2digits」という関数を利用して1桁の数字を出力する時は、最初に0を出力してを形を整えることもできます。
このコードをアップロードした後、シリアルモニタを開いてみます。
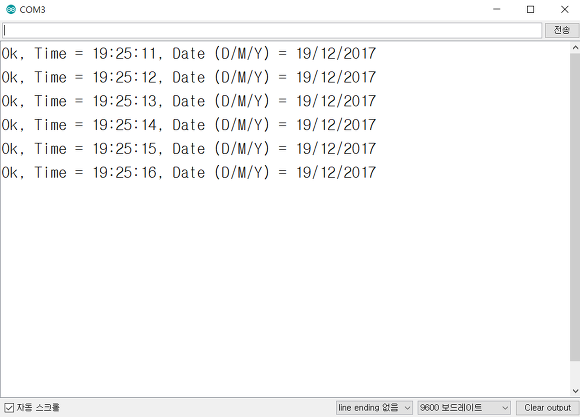
delayを1000に設定しておいたので、1秒間隔で時間を読み取ることができます。
そこで、今度はMODLINKと接続してウェブから時間を受け取ってみましょう。
そのためには先ず、文字列をサーバーに送る方法を知っておかなければなりません。
下のリンクに詳しい説明が記載されているので、是非ご参照ください。
|
1
2
3
4
5
6
7
8
9
10
11
12
13
14
15
16
17
18
19
20
21
22
23
24
25
26
27
28
29
30
31
32
33
34
35
36
37
38
39
40
41
|
#include <Wire.h>
#include <TimeLib.h>
#include <DS1307RTC.h>
#include <VitconBrokerComm.h>
using namespace vitcon;
#define ITEM_COUNT 2
char msg[50];
tmElements_t tm;
void buttonStatus(bool val){
if( val ){
msg[0] = 0;
char tmp[10] = {0};
if (RTC.read(tm)) {
itoa(tm.Hour,tmp,10);
strcat(msg,tmp);
itoa(tm.Minute,tmp,10);
strcat(msg,tmp);
itoa(tm.Second,tmp,10);
strcat(msg,tmp);
}
}
}
IOTItemStr str;
IOTItemBin button(buttonStatus);
IOTItem *items[ITEM_COUNT] = { &str, &button};
const char device_id[] = ” 자신의 장비 ID “;
BrokerComm comm(&Serial, device_id, items, ITEM_COUNT);
void setup() {
Serial.begin(250000);
comm.SetInterval(200);
}
void loop() {
str.Set(msg);
comm.Run();
}
|
cs |
ボタンが押される度に、
itoaの関数を利用して数字を文字列に変えて
strcatの関数を利用してmsgという文字列に貼り付けます。
最後に、Setの関数を利用してWebに送れば完了です。
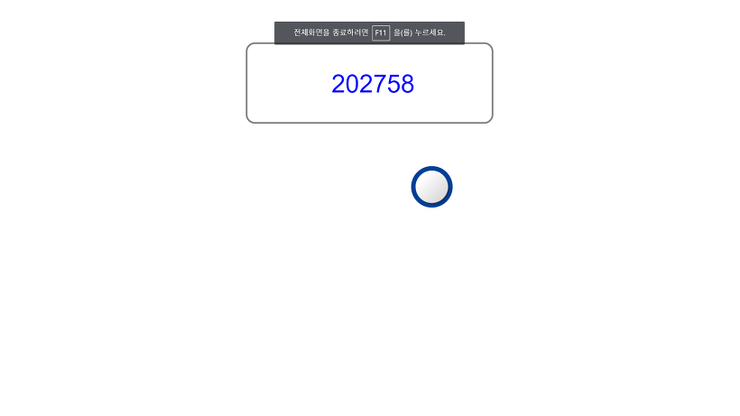
今回の例題は、C言語の文字列を学習したことがある方にとっては簡単です。
もし習っていないならば、これからどんどん学習していきましょう!!